Pages

Tuesday, April 9, 2013

My Asian Reborn (Mini Tutorial)

Hello and welcome!
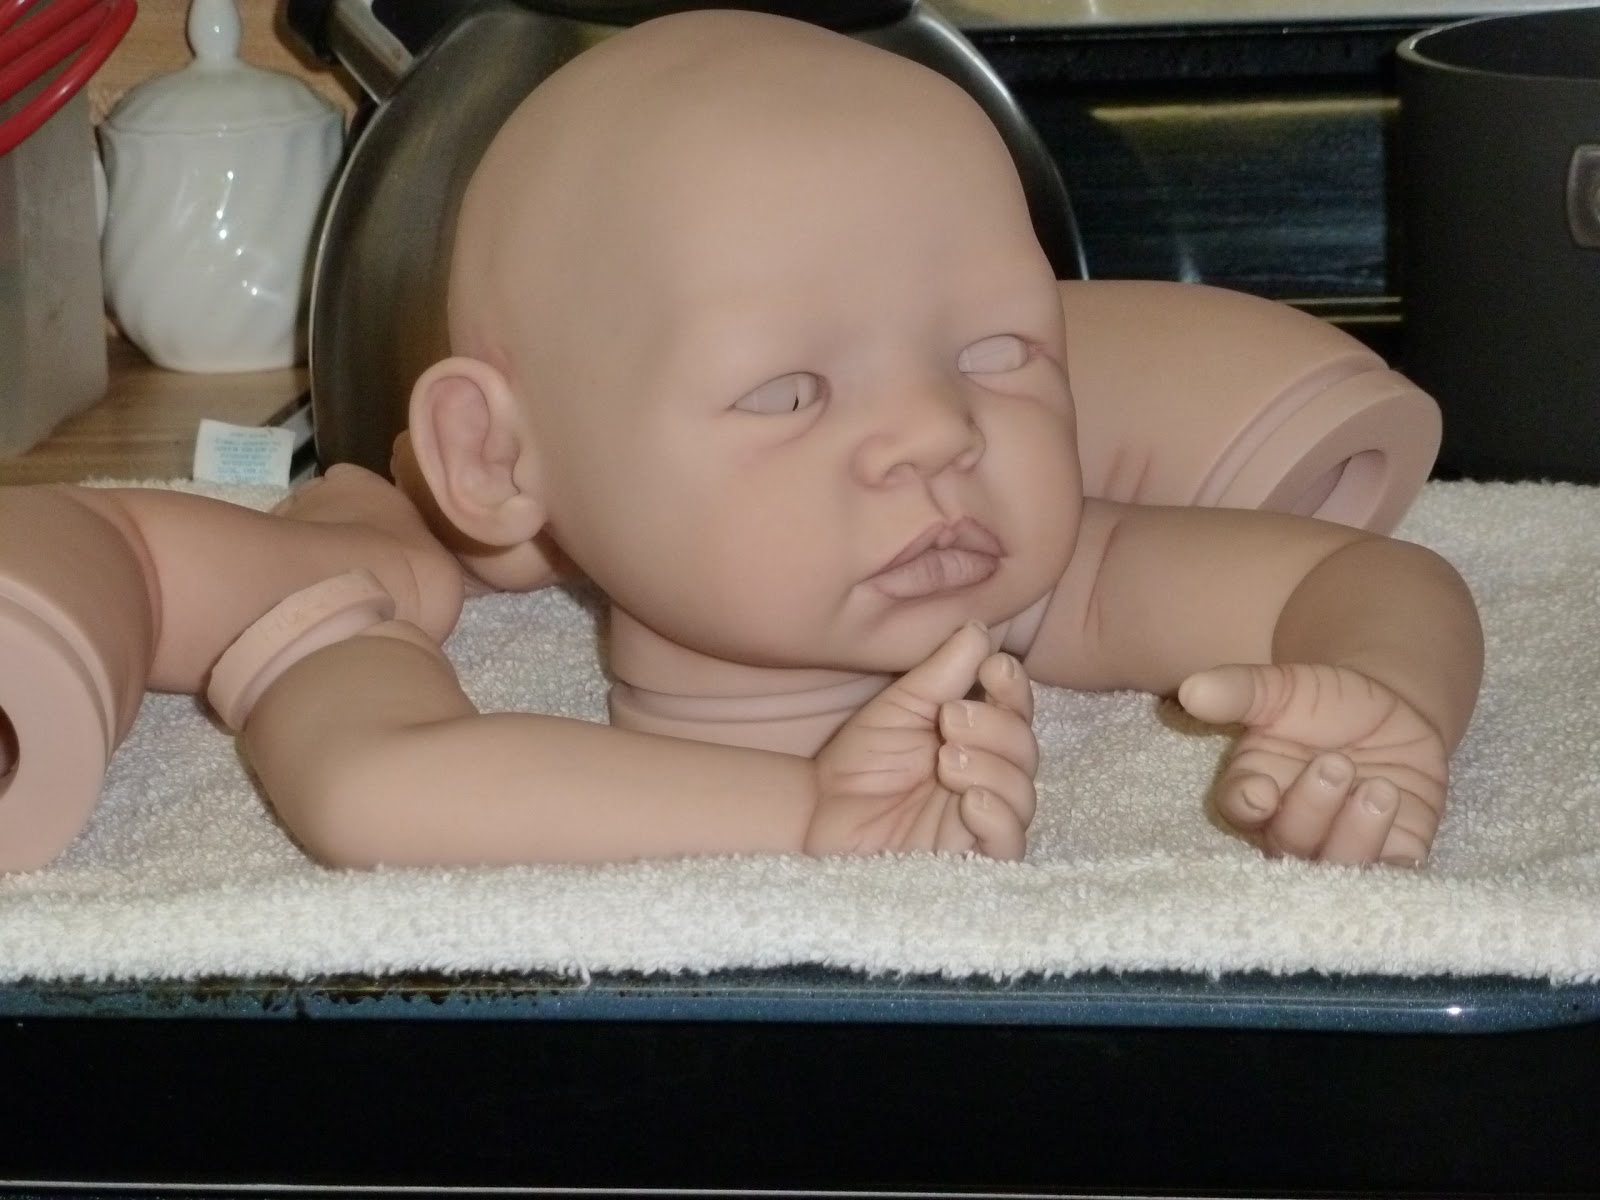
Today I began reborning my "Riley" kit by Aleina Peterson.
I thought that she would look great with an Asian skin tone. Now, I wasn't sure what steps I should take to achieve the tone that I was wanting so I did a bit of digging to find out.
I viewed a LOT of pictures of Asian babies on google, which by the way were so so cute!
I found a couple of forums that mentioned some colors used, and of course Nicki Holland's tutorial using Real Effects air dry paints.
Since I use GHS paints, I had to come up with my own game plan.
I had the basic reborning kit (from Bountiful Baby) and a few other colors I ordered separate. and so I ordered also yellow ochre, flesh 05, and flesh 04 all in .5 full oz. jars (quite a LOT) which cost me around $20 US dollars.
And so I began this morning with a fresh, clean "baby".
I started with a wash of yellow ochre.
I wanted to do that first so it would give the kit a good foundation for the skin tone I was going for.
 
 This is the consistency that you want, really nice and thin on the paper towel and nice and thin in your mixing tray.
I used much more than this but needed to mix it up again to demonstrate.
Apply with your brush and then pounce with a cosmetic wedge.

I VERY lightly veined her in the next step, also started with creases and lips.
 

Now comes the first skin.
I mixed Flesh 05, with a bit of Flesh 08, Yellow Ochre, and some thinner.
 
 
Brush paint on sponge, pounce from sponge on vinyl.
 
I'm not sure you can see the actual color difference, but in person it's pretty dark!
Remember to bake at 265 degrees Fahrenheit for AT LEAST 8 minutes.
I bake for 9 full minutes when I have large areas of paint.
And PLEASE!!! take your time! Let all the thinners dry off before baking so that you can check the final area where paint is. I worked for over 11 hours just today and I have a couple of steps still left to do that I will explain at the end of the post.
Also let the vinyl cool completely between baking and painting.
 
So next, I did another crease and also did the half moons on her toes and nails.
This step is usually so hard, BUT I have a great tip!
Use the calligraphy pen that I showed you on my painted hair blog post tutorial!
(oh sorry, I forgot to take a picture of her half moons!)
 
 
Okay, going a little darker.


This is Flesh 05 Flesh 04 and yellow ochre with thinner.
Again, apply the paint to the sponge first.
 
 
 The photo above was to show her little lips. The thinner hasn't quite evaporated off yet so she looks shiny, but she is really just wet.
One other step I didn't show was tipping her nails. I did this with a toothpick and a few coats after I did her half moons because I wanted her nail tips to be brighter then the half moons.
 
 
Okay, the toothpicks are where I drilled her nostrils and was making sure they stayed nice and round.
I have to say that I am so happy with how she came out today! I did do some very light brows so that I have a bit of a guide tomorrow, but after her brows I have just to painter over her little nail bed with a pinky flesh tone, and then varnish her pieces. I just ordered some more mohair for her, I have one order of 1/4 oz black mohair, but I am not quite sure it will be enough, so I ordered more just to be safe.
I hope that you enjoyed todays part of the tutorial on Asian skin.
Tomorrow I am going to make her body and finish up her final baking, start her rooting and take more photos.
Thanks for visiting, and God Bless!

Monday, April 8, 2013

Vintage Bassinet

Hello again! I finally brought the bassinet in since it has been warm and dry for a couple of days. It had a chance to dry out after I wiped it down last week. Next I will be kilzing it (spray kilz for all the nooks and crannies) and then I was thinking about using that new(ish) Valspar spray paint but haven't decided on the color yet, since this is going to be my bed for my personal collection of babies but also my adoptees picture spot. I want to be able to display it.


Isn't it awsome?! Well, I am planning to start on little Riley (she needs a new name) in the morning and also take Eden's pictures so that I can load them and get them on eBay, I don't have to work so that will take up most of my time, but I really want to update you on my progress with Riley.
My plan with Eden is that since she has painted hair, I am listing her for under $150. I am not sure if I will start her at $100 or maybe even less. But I hope she gets a lot of attention. I light painted hair as well as rooted, but I have seen some popular artist on eBay talking bad about painted hair, so I am not sure she will be successfully auctioned, but I hope so. I know that some people are allergic to mohair, but also it is really almost impossible to micro root human hair because often times it is a thicker strand and does not look like newborn hair.
I still need to make a body for Riley, but I am not sure that I have a good fabric that would look right, but more on that later.
Thanks for stopping by! 

Wednesday, April 3, 2013

Eden's Calligraphy Hair painting Tutorial

Hello again!
I decided that I would share a little trick that I discovered to help with painted hair!
I was talking to my MIL and we were discussing my latest little Eden and I was telling her about my tip I discovered and so I am sharing with her and you what I did!
 
First, this is what I have done so far.
She needs more darkness in her locks and I need to start running the hairs together, but right now I am just going to add another layer before I bake.


Okay, I can't actually take credit for this but I don't know exactly which blog I saw this on.
This involves ordering a calligraphy pen and nib (the tip). I ordered mine from www.dickblick.com and got the #107 speedball nib (two of them) with the pen, and I also picked up a couple other sizes that specified for fine lines.


Here I am trying to show you the nib. It is really small and says 107 on it.


I've mixed up my Genesis Heat Set Paints in my special color that I am customizing (I don't have black, but am using a mix of colors to give depth).


Dip the nib end into the paint (I used a small well so that the paint would be deep).
 
 
I'm not sure you can see but the "ink" builds up in the well of the nib.
 
 
That lets you paint a longer, finer line.
 
 
When starting, it helps to go from R to L (if you are right handed) or L to R (for you lefties).
I say this because you will most likely be using your pinky to steady your pen or brush.
And if you are using your pinky you want to paint towards your dominant hand so that you don't smear fresh paint (speaking from experience).
 
 
Also be sure to hold the pen more upright for the paint to flow better.
You'll have to experiment with pressure to see what works for you!


Hope you enjoyed!
Please let me know if you have any questions. And I'll post an updated picture of little Eden tomorrow when I do some more detail work.
Thanks.